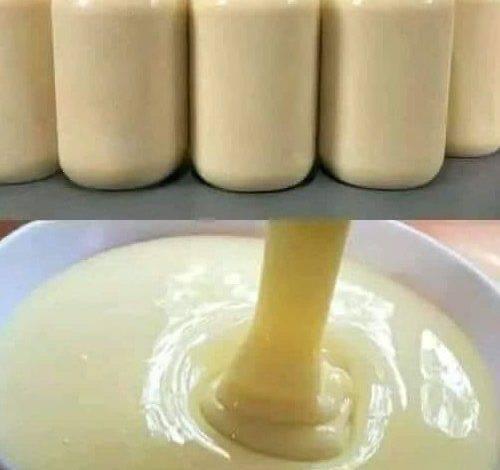
Sweetened condensed milk is a staple in many dessert recipes, known for its thick, creamy texture and sweet, caramelized flavor. This pantry essential is used in a wide range of baked goods, candies, and beverages, from classic fudge to tres leches cake. Instead of buying it from the store, why not make it at home? Not only is homemade sweetened condensed milk cost-effective, but it also gives you control over the ingredients, especially if you’re looking to avoid preservatives. This recipe is easy to follow, requires just a few ingredients, and takes around 45 minutes to complete. With this guide, you’ll soon have smooth, rich, and flavorful condensed milk that’s perfect for all your culinary needs.
Ingredients
- 2 cups whole milk (or substitute with heavy cream for a richer flavor)
- 2/3 cup granulated sugar
- 3 tablespoons unsalted butter (optional, for extra creaminess)
- 1/4 teaspoon baking soda (optional, to prevent curdling)
Preparation Time
- Total time: 45 minutes
- Active time: 10 minutes
- Cooking time: 35 minutes
Step-by-Step Instructions
Step 1: Combine the Ingredients
In a medium saucepan, add the 2 cups of milk and 2/3 cup of granulated sugar. If you’d like a richer flavor, you may substitute the milk with heavy cream. Stir the mixture well to dissolve the sugar completely before turning on the heat.
Step 2: Start Heating the Mixture
Place the saucepan over medium-low heat, allowing the milk and sugar mixture to slowly heat up. Stir gently but frequently to ensure that the sugar dissolves and does not settle at the bottom, which can lead to burning.
Step 3: Simmer and Reduce the Milk
Once the sugar has dissolved, lower the heat and bring the mixture to a gentle simmer. This is the most critical step, as reducing the milk is what will create the thick consistency of sweetened condensed milk. Let it simmer for around 35 minutes, stirring occasionally to prevent sticking and to evenly reduce the liquid.
Step 4: Add Optional Ingredients for Extra Smoothness
If you prefer a creamier texture, add 3 tablespoons of unsalted butter halfway through the simmering process. This step is optional, but it enhances the richness. Additionally, adding a pinch (1/4 teaspoon) of baking soda toward the end of cooking can help prevent curdling. This is especially helpful if you’re using milk with a lower fat content.
Step 5: Check the Consistency
After approximately 35 minutes, the milk should have reduced by half and should be thick enough to coat the back of a spoon. If you notice that the mixture is still thin, you can continue simmering it for a few more minutes until it reaches the desired thickness. Remember that the milk will thicken even more as it cools.
Step 6: Remove from Heat and Cool
Once your condensed milk has thickened, remove the saucepan from heat. Allow it to cool in the saucepan for a few minutes. Afterward, transfer it to a clean, airtight container. Let the milk cool completely before sealing the container and refrigerating it.
Presentation
Homemade sweetened condensed milk can be stored in a small glass jar or mason jar, giving it a rustic, homemade look. You can also label the jar if you plan to gift it or store it for later use. This creamy, smooth, and slightly caramel-colored milk is a perfect addition to desserts and baked goods and can even be enjoyed by itself as a drizzle over fruit or ice cream. The flavor is deeper and more caramel-like than store-bought versions, making it a delightful enhancement to any recipe that calls for it.
Storage and Usage Tips
- Refrigeration: This homemade condensed milk can be stored in the refrigerator for up to 2 weeks.
- Freezing: If you’d like to store it longer, consider freezing it in portion-sized containers for up to 3 months. Before use, allow it to thaw overnight in the refrigerator.
- Substitutes: You can substitute the whole milk with non-dairy milk, such as almond or oat milk, but be mindful that this may slightly alter the texture.
Making sweetened condensed milk at home is an enjoyable and rewarding process. With only a few simple ingredients, you can create a versatile ingredient that adds a depth of flavor to both classic and modern desserts. Once you’ve mastered this recipe, you may never want to go back to store-bought options. Enjoy the rich taste of homemade sweetened condensed milk in your favorite recipes, from coffee and fudge to pies and cookies. The best part? You can make it any time with ingredients you probably already have in your kitchen.
This homemade version is sure to elevate your desserts, giving them a personal touch and authentic flavor. Try it today, and you’ll have a fresh, delicious batch of sweetened condensed milk ready for whatever your culinary creations require. Happy cooking!
