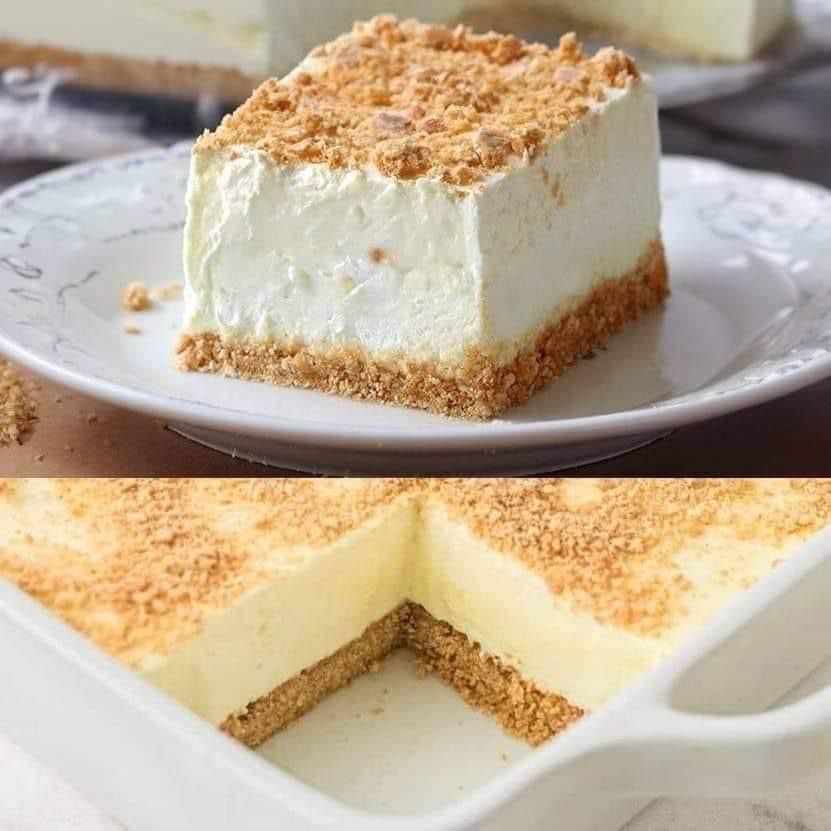
Woolworth’s Icebox Cheesecake Recipe
Ingredients
For the Crust:
- 2 ½ cups graham cracker crumbs (about 2 sleeves)
- ½ cup unsalted butter, melted
- ¼ cup granulated sugar
- 1 teaspoon ground cinnamon (optional, for added flavor)
For the Filling:
- 1 package (3 ounces) lemon-flavored gelatin (Jell-O)
- 1 cup boiling water
- 8 ounces cream cheese, softened
- 1 cup granulated sugar
- 1 teaspoon pure vanilla extract
- 1 tablespoon fresh lemon juice
- 1 teaspoon lemon zest
- 1 can (12 ounces) evaporated milk, thoroughly chilled
For the Topping (Optional):
- Fresh berries (strawberries, blueberries, or raspberries)
- Mint leaves
- A light dusting of powdered sugar
Instructions
1. Prepare the Crust
- Combine Dry Ingredients: In a medium mixing bowl, combine the graham cracker crumbs, granulated sugar, and ground cinnamon. Mix well to ensure even distribution of ingredients.
- Add Butter: Pour the melted unsalted butter over the dry mixture. Stir until all the crumbs are moistened and the mixture resembles wet sand.
- Form the Crust: Press the crumb mixture evenly into the bottom of a 9×13-inch baking dish. Use the back of a spoon or the bottom of a flat measuring cup to press down firmly, creating a solid base.
- Chill: Place the crust in the refrigerator to set while you prepare the filling.
2. Prepare the Gelatin Mixture
- Dissolve Gelatin: In a large heatproof bowl, pour 1 cup of boiling water over the lemon-flavored gelatin powder. Stir continuously until the gelatin is completely dissolved, with no granules remaining.
- Cool the Gelatin: Allow the gelatin mixture to cool to room temperature. You can speed up this process by placing the bowl in an ice bath and stirring occasionally.
3. Prepare the Cream Cheese Mixture
- Beat Cream Cheese: In a separate large mixing bowl, beat the softened cream cheese using an electric mixer on medium speed until it’s smooth and free of lumps.
- Add Sugar and Flavorings: Gradually add the granulated sugar to the cream cheese, continuing to beat until well incorporated. Mix in the pure vanilla extract, fresh lemon juice, and lemon zest. Beat until the mixture is light and fluffy.
4. Combine Gelatin and Cream Cheese Mixtures
- Blend Together: Slowly pour the cooled gelatin mixture into the cream cheese mixture. Beat on low speed until fully combined, ensuring a smooth, homogeneous mixture.
- Check Consistency: The mixture should be creamy and slightly thickened. If lumps remain, continue beating until the texture is smooth.
5. Whip the Evaporated Milk
- Chill Equipment: For optimal results, place your mixing bowl and beaters in the freezer for about 15 minutes before whipping.
- Whip Milk: Remove the thoroughly chilled evaporated milk from the refrigerator and pour it into the chilled bowl. Beat on high speed until the milk doubles in volume and forms soft peaks, approximately 5-7 minutes.
6. Fold Ingredients Together
- Combine Mixtures: Gently fold the whipped evaporated milk into the cream cheese and gelatin mixture. Use a spatula to fold, lifting from the bottom and turning over gently to maintain the airy texture.
- Ensure Uniformity: Continue folding until the mixture is fully combined and uniform in color. Avoid overmixing to prevent deflating the whipped milk.
7. Assemble the Cheesecake
- Pour Filling over Crust: Retrieve the prepared crust from the refrigerator. Carefully pour the filling over the crust, spreading it evenly with a spatula.
- Smooth the Surface: Tap the baking dish gently on the countertop to release any trapped air bubbles and smooth out the top.
8. Chill to Set
- Refrigerate: Cover the baking dish with plastic wrap or aluminum foil to prevent the absorption of refrigerator odors.
- Set Completely: Place the cheesecake in the refrigerator and chill for at least 4 hours, or preferably overnight, to allow it to set firmly.
9. Serve
- Slice: Once set, remove the cheesecake from the refrigerator. Use a sharp knife to cut it into squares or slices. For cleaner cuts, wipe the knife blade with a warm, damp cloth between each slice.
- Garnish (Optional): Add fresh berries on top of each piece. You can also garnish with mint leaves and a light dusting of powdered sugar for an elegant touch.
- Enjoy: Serve the cheesecake chilled. Its light, mousse-like texture and refreshing lemon flavor make it a delightful dessert.
Tips and Variations
- Chilling is Crucial: Ensure the evaporated milk and mixing equipment are thoroughly chilled to achieve maximum volume when whipping.
- Alternative Crust: For a different flavor, substitute graham cracker crumbs with vanilla wafer crumbs or crushed digestive biscuits.
- Flavor Twists: Experiment with different gelatin flavors such as strawberry, raspberry, or lime to create new variations of this classic dessert.
- Citrus Boost: For an extra zesty kick, increase the amount of lemon zest or add a splash of lime juice.
- Make Ahead: This cheesecake is an excellent make-ahead dessert for parties and gatherings, as it needs time to set and can be prepared the day before.
- Storage: Cover leftovers tightly with plastic wrap and store in the refrigerator for up to 3 days. The texture remains light and fluffy when properly stored.
- Freezing Option: You can freeze the cheesecake for up to 1 month. Wrap it securely in plastic wrap and aluminum foil to prevent freezer burn. Thaw in the refrigerator overnight before serving.
Enjoy this unique take on the Woolworth’s Icebox Cheesecake—a delightful combination of creamy cheesecake and refreshing lemon flavor, all atop a buttery graham cracker crust. This dessert is sure to become a favorite at family gatherings, potlucks, and holiday dinners.Whether you’re indulging on a warm summer day or looking for a light ending to a hearty meal, this icebox cheesecake offers a perfect balance of sweetness and tanginess. Its airy texture and vibrant taste make it a standout dessert that’s both nostalgic and timeless.
