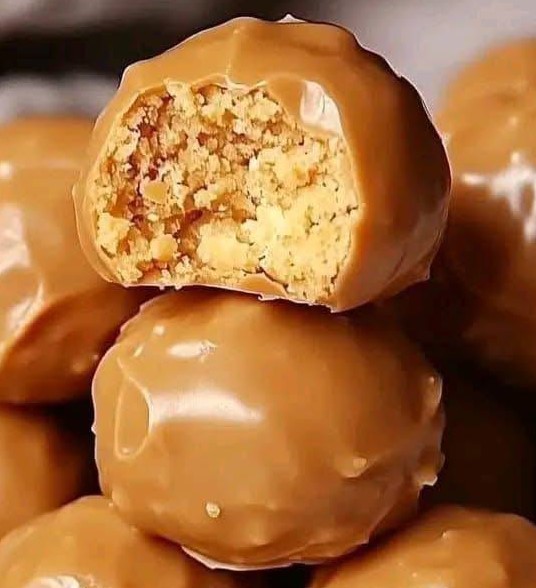
Butterfinger Balls are the ultimate no-bake dessert, combining the creamy goodness of peanut butter with the satisfying crunch of Butterfinger candy. These bite-sized treats are easy to prepare and perfect for holidays, parties, or a quick sweet fix. Whether you’re a seasoned baker or a kitchen novice, this recipe is guaranteed to delight your taste buds and impress your guests. Let’s dive into the recipe that takes minimal effort but delivers maximum flavor!
Preparation Time:
- Prep Time: 20 minutes
- Chill Time: 1 hour
- Total Time: 1 hour 20 minutes
Ingredients:
- 1 cup peanut butter (creamy or chunky, based on preference)
- 1/2 cup butter, softened
- 1 teaspoon vanilla extract
- 1 cup powdered sugar
- 1 1/2 cups crushed Butterfinger candy bars
- 1 1/2 cups semi-sweet chocolate chips
- 1 tablespoon coconut oil or vegetable shortening (optional, for a smoother chocolate coating)
Instructions:
Step 1: Prepare the Peanut Butter Mixture
- In a large mixing bowl, combine the softened butter and peanut butter. Use a hand mixer or a sturdy spoon to blend them until the mixture is smooth and creamy.
- Add the vanilla extract and powdered sugar. Mix well until the ingredients form a dough-like consistency. The mixture should be firm enough to roll into balls without sticking to your hands. If it’s too soft, refrigerate for 10–15 minutes.
Step 2: Incorporate the Butterfinger Crunch
- Gently fold in the crushed Butterfinger candy bars using a spatula or your hands. Ensure the candy pieces are evenly distributed throughout the peanut butter mixture for consistent flavor in every bite.
- Roll the mixture into small balls, approximately 1 inch in diameter, and place them on a parchment-lined baking sheet.
Step 3: Chill the Balls
- Transfer the baking sheet to the refrigerator and chill the balls for at least 30 minutes. This step helps them firm up, making them easier to coat in chocolate.
Step 4: Prepare the Chocolate Coating
- While the Butterfinger balls are chilling, melt the semi-sweet chocolate chips in a microwave-safe bowl. Heat the chocolate in 20–30 second intervals, stirring after each interval, until smooth and fully melted.
- For a shinier coating, stir in 1 tablespoon of coconut oil or vegetable shortening.
Step 5: Coat the Butterfinger Balls
- Remove the chilled balls from the refrigerator. Using a fork or toothpick, dip each ball into the melted chocolate, ensuring it is fully coated. Allow any excess chocolate to drip off.
- Place the coated balls back on the parchment-lined baking sheet. If desired, sprinkle additional crushed Butterfinger candy on top for decoration.
Step 6: Final Chill
- Return the baking sheet to the refrigerator and chill the Butterfinger balls for at least 30 minutes or until the chocolate has completely set.
- Once set, transfer the balls to an airtight container. They can be stored in the refrigerator for up to a week or frozen for longer storage.
Butterfinger Balls are an irresistible combination of creamy, crunchy, and chocolaty goodness. These no-bake treats are as fun to make as they are to eat, requiring minimal ingredients and effort. Whether you’re making them for a special event or a casual family dessert, they’re bound to be a hit. Enjoy these sweet morsels and watch them disappear in no time! Share this recipe with friends and family—they’ll thank you for it!
Tips for Success:
- For easier handling, lightly grease your hands with a bit of butter or oil before rolling the mixture into balls.
- Experiment with different coatings, such as white chocolate or a drizzle of caramel, for a unique twist.
- Use crushed Butterfinger candy bars or Butterfinger baking bits for convenience.
Happy cooking and enjoy your delicious Butterfinger Balls!
