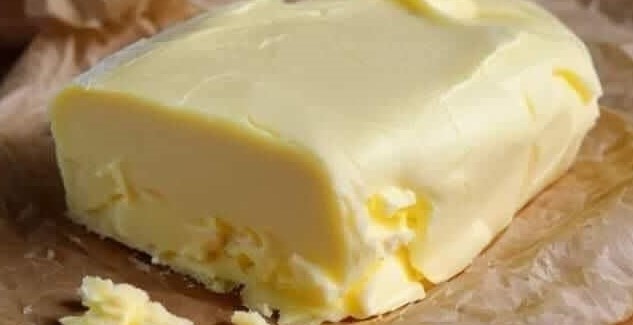
Homemade Butter Recipe: Easy Step-by-Step Guide to Fresh, Creamy Butter
Homemade butter is a timeless kitchen delight, offering rich flavor, wholesome ingredients, and the satisfaction of creating something from scratch. With just a pint of heavy cream and a few tools, you can enjoy fresh, creamy butter in under 15 minutes. This detailed guide will walk you through the process, ensuring you achieve perfect results every time. Let’s dive into the art of butter-making, a skill cherished for generations.
Ingredients for Homemade Butter
- 1 pint (2/3 cup) of heavy cream: Organic or grass-fed cream is highly recommended for a richer flavor and better nutritional value. The quality of cream significantly impacts the taste and texture of your butter.
- Pinch of salt (optional): For enhanced flavor. Choose a high-quality sea salt or Himalayan pink salt for the best results.
Essential Equipment
- Mixing tools: A stand mixer, hand mixer, food processor, or even a mason jar (if you prefer a manual workout).
- Large mixing bowl: To hold the cream and allow room for whipping.
- Fine mesh strainer or cheesecloth: To separate the butter solids from the buttermilk.
- Spatula: For scraping and shaping the butter.
How to Make Butter at Home
Step 1: Whip the Cream
- Pour the cream: Begin by pouring the heavy cream into a large mixing bowl or the bowl of your stand mixer.
- Whip the cream: Using a medium-high speed, whip the cream. Initially, it will turn into whipped cream with soft peaks. Continue whipping, and within 5–10 minutes, you’ll notice the cream separating into butter solids and buttermilk. This transformation is your cue to stop mixing.
Tip: If using a mason jar, fill it halfway with cream, secure the lid, and shake vigorously. While this method takes longer (10–20 minutes), it’s an excellent workout and fun for kids.
Step 2: Strain the Butter
- Separate the buttermilk: Once the cream separates, turn off your mixer. Pour the mixture through a fine mesh strainer or cheesecloth to separate the buttermilk from the butter solids.
- Save the buttermilk: Don’t throw away the buttermilk! It’s perfect for baking fluffy pancakes, tender biscuits, or savory cornbread.
Step 3: Rinse the Butter
- Transfer to a bowl: Place the butter solids into a clean mixing bowl.
- Rinse with cold water: Add cold water to the bowl and gently knead the butter with a spatula or your hands to remove any remaining buttermilk. This step ensures your butter stays fresh longer.
- Repeat as needed: Drain the water and repeat the rinsing process until the water runs clear.
Step 4: Add Salt (Optional)
- Season the butter: If you’d like salted butter, sprinkle a pinch of salt over the butter and mix thoroughly. Adjust the salt to your taste preferences.
- Customize flavors: For a unique twist, try adding herbs, garlic, or honey for flavored butter.
Step 5: Shape and Store
- Shape the butter: Use a spatula to shape your butter into a log, ball, or any preferred form. Alternatively, press it into a butter mold for a professional look.
- Store properly: Wrap the butter in parchment paper or store it in an airtight container. Refrigerate it for up to two weeks or freeze it for longer storage.
Tips for Making the Best Homemade Butter
- Use fresh cream: The fresher the cream, the better your butter will taste.
- Temperature matters: Cold cream works best for whipping, while rinsing with cold water helps preserve the butter’s texture and shelf life.
- Experiment with flavors: Homemade butter is versatile. Add sweeteners like honey or cinnamon for breakfast spreads, or mix in fresh herbs and spices for savory dishes.
Frequently Asked Questions
1. Can I use any type of cream?
While you can use regular heavy cream, organic or grass-fed cream yields the best flavor and nutritional benefits. Avoid ultra-pasteurized cream, as it may not separate properly.
2. How long does homemade butter last?
Homemade butter lasts about two weeks in the refrigerator when stored in an airtight container. If frozen, it can last up to three months.
3. What can I do with the leftover buttermilk?
Buttermilk is incredibly versatile. Use it to make pancakes, waffles, biscuits, or marinades. It’s a treasure, not a waste!
Why Make Homemade Butter?
Making butter at home offers numerous benefits:
- Freshness: Enjoy butter made with pure, simple ingredients.
- Cost-effective: Homemade butter can be more economical, especially if you have access to fresh cream.
- Customizable: Tailor the flavor to your liking with salt, herbs, or sweeteners.
- Sustainable: Reduce packaging waste by making butter at home.
Creative Uses for Homemade Butter
- Spread it: Perfect for toast, muffins, or scones.
- Bake with it: Use in cookies, cakes, and pastries for a richer flavor.
- Cook with it: Sauté vegetables, fry eggs, or make creamy sauces.
- Gift it: Homemade butter makes a thoughtful, delicious gift for friends and family.
Homemade butter is a rewarding kitchen project that combines simplicity with satisfaction. By following this step-by-step guide, you’ll create a delicious, versatile staple that enhances every dish it touches. Whether you’re spreading it on warm bread or baking it into a favorite recipe, your homemade butter will undoubtedly become a treasured addition to your kitchen.
