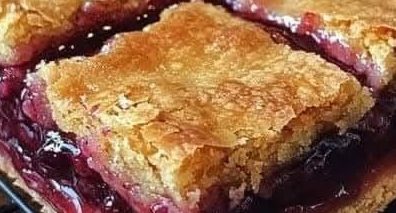
Cherry Pie Bars are a delightful dessert that combines the sweet, tangy flavors of cherries with a buttery, tender crust. Whether you’re preparing them for a family gathering, a picnic, or simply as a midweek treat, these bars are sure to impress. They are easy to make, require simple ingredients, and can be adapted for various occasions. Plus, the balance of flavors and textures makes them irresistible. Let’s dive into how to make this delectable treat from scratch.
Preparation Time
- Prep Time: 15 minutes
- Cook Time: 30-35 minutes
- Cooling Time: 20 minutes
- Total Time: 1 hour 10 minutes
Ingredients
Here’s what you’ll need to make Cherry Pie Bars:
- For the Crust and Topping:
- 1 cup butter, softened
- 2 cups sugar
- 4 eggs
- 1 teaspoon vanilla extract
- ¼ teaspoon almond extract
- 3 cups all-purpose flour
- For the Filling:
- 1 can (21 ounces) cherry pie filling (or homemade cherry filling)
- For the Glaze:
- 1 cup powdered sugar
- 2–3 tablespoons milk
- ½ teaspoon vanilla extract
Instructions
1. Preheat the Oven
Begin by preheating your oven to 350°F (175°C). Grease a 9×13-inch baking pan or line it with parchment paper for easy removal.
2. Make the Dough
- In a large mixing bowl, cream the butter and sugar together until light and fluffy. This takes about 2-3 minutes using a hand or stand mixer.
- Add the eggs one at a time, mixing well after each addition.
- Stir in the vanilla extract and almond extract for a fragrant touch.
- Gradually add the flour, mixing until just combined. The dough will be thick.
3. Assemble the Base
- Spread two-thirds of the dough evenly into the prepared baking pan. Use a spatula or your hands to press it down into a smooth layer.
- Evenly spread the cherry pie filling over the dough layer.
4. Add the Topping
- Drop small dollops of the remaining dough over the cherry filling. It’s okay if it doesn’t cover the filling entirely; the topping will spread slightly as it bakes, creating a beautiful marbled look.
5. Bake
Place the pan in the preheated oven and bake for 30–35 minutes, or until the top is lightly golden and set.
6. Prepare the Glaze
While the bars are baking, prepare the glaze:
- In a small bowl, whisk together the powdered sugar, milk, and vanilla extract until smooth. Adjust the consistency with more milk if needed.
7. Cool and Glaze
- Remove the bars from the oven and let them cool in the pan for 20 minutes.
- Once cool, drizzle the glaze over the top using a spoon or a piping bag for a more decorative touch. Allow the glaze to set before cutting.
8. Slice and Serve
Cut the bars into squares or rectangles and serve. Enjoy them warm or at room temperature, paired with a cup of coffee or tea.
Tips for Success
- Customizing the Filling: If you’re not a fan of cherries, you can substitute the cherry pie filling with blueberry, raspberry, or even apple pie filling for a unique twist.
- Homemade Cherry Filling: For a homemade touch, cook fresh cherries with sugar, lemon juice, and cornstarch to make your own filling.
- Storing the Bars: Store the bars in an airtight container at room temperature for up to 2 days or in the refrigerator for up to a week.
Why You’ll Love This Recipe
Cherry Pie Bars offer a perfect balance between a sweet and tangy filling, a buttery crust, and a luscious glaze. They are incredibly versatile—you can serve them as a dessert, a sweet snack, or even as a treat for special occasions. These bars are simple to make, but their impressive appearance and flavor make them stand out.
In conclusion, Cherry Pie Bars are a crowd-pleaser and a timeless recipe that brings together the comforting flavors of cherry pie in an easy-to-make bar form. Perfect for bakers of all levels, this recipe is both rewarding and fun to prepare. Try it today, and experience the magic of homemade goodness in every bite!
